How to remove a dent (Part 4)
Taking out a massive 30 plus year old dent in a left rear quarter of a 1957 Porsche Speedster.
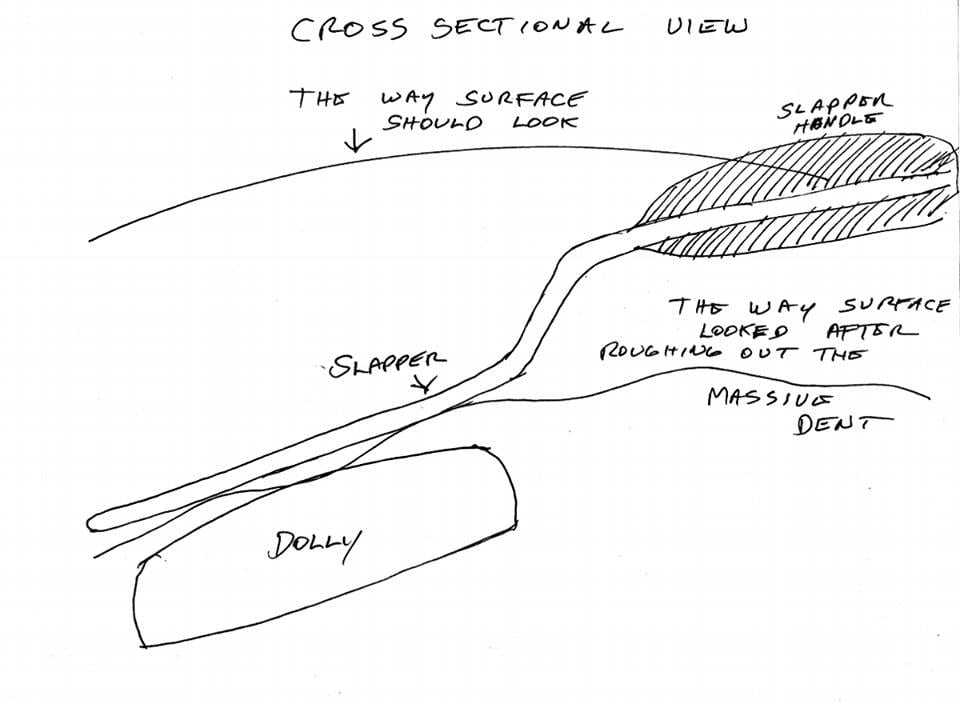
Tonight I’ll show some of the action that takes place in the sheet metal when you are smoothing it using two drawings and two pictures. The first drawing shows a cross sectional view of the sheet metal. At the top I depicted a nice smooth flowing curve, that is what the panel is supposed to look like. Below it I depicted the roughed out surface after banging out the massive dent ( 24″ wide by 4″ deep). This is how the surface looked after using the shaping mallet to power it out from the back side. Also in this drawing the slapper and dolly are depicted as they are used. You can see the slapper bridges the two high spots and the dolly below positions itself in the center of the low area. What happens when you strike the metal with a slapper is you drive the two highs down (a body hammer has a small head and will not bridge two highs like a slapper will), and the dolly’s mass and small contact area force the low up. In effect you are ironing the surface ruffles out. I call this changing the arrangement. The correct surface arrangement for the panel is the top line, that is our goal. The sheet metal is exactly like clay but a little more stubborn so instead of squeezing in your hands like you do clay, you have to persuade it with the slapper and dolly. The sheet metal stretched a little in the process of getting the original dent and also when I used the mallet to rearrange it back towards it’s original smooth flowing line arrangement.
Stretching or shrinking of sheet metal I call area change. The amount of area was changed from it’s original amount to a new amount. The original denting and the roughing out I would guess added a growth of the area by about 1 percent ( not a lot). Most of what we call a dent is an arrangement value change. 99% of the job of removing a dent is returning the panel to it’s correct arrangement. In the process using the shrinking disc correctly we will also shrink out the 1% area change that happened.
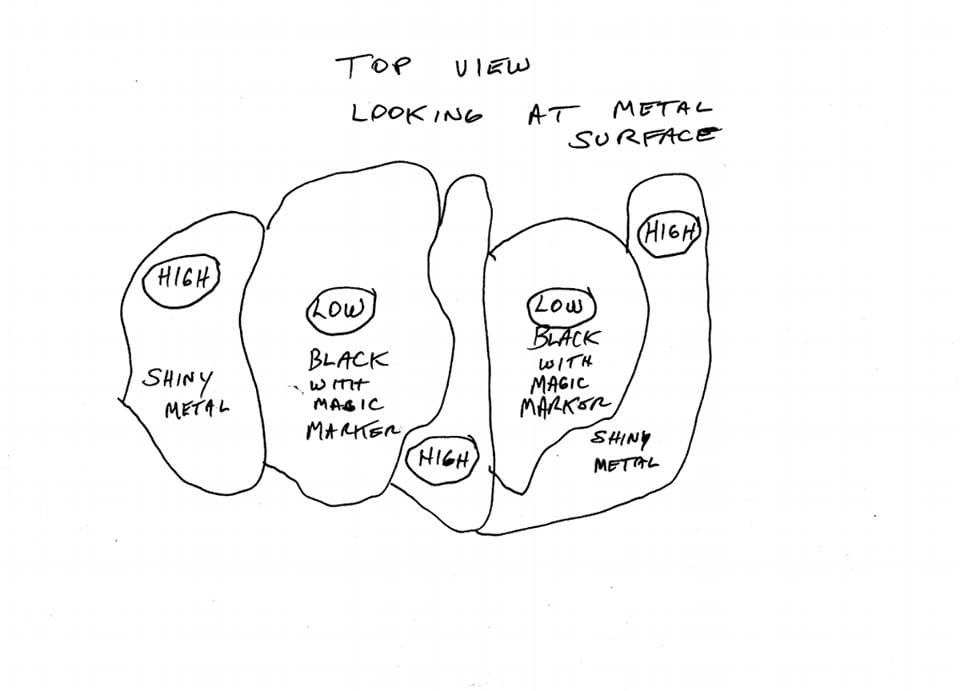
In the second drawing I have depicted a typical condition on any dented sheet metal after you highlight the magic marker covered surface with a file or flat sanding block. The process is to place your dolly in under the black low areas, an then slap the two shiny highs. In the process the black areas start to shrink in both area and depth. When they are only 20 thousands of an inch low or so you will start to see shiny contact area footprints every time you strike the slapper where the dolly is located underneath the panel. These footprints allow you to steer the dolly around the low area. After hitting with the slapper a few times you can lightly polish the area again with the file or sanding block and you will notice that the black area reduced in area. The dent is rearranging to the desired correct arrangement
( smoothness and a flowing line). In the process of slapping and seeing the contact area where the dolly is making contact ( confirmed by a nice ringing sound and the dollie’s contact area footprint), the sheet metal will very slightly compression stretch. The shrinking disc is used after bringing up a bunch of black low areas, to both shrink out any area change and the shrinking disc itself also acts as a smoothing or ironing tool when you apply pressure. You have to be careful to not get carried away because you can easily over shrink an area. If you do, you just stretch it out again with slapper on dolly compression stretching.
When you master the process it becomes fun because no longer are you at the whim of the sheet metal and being baffled by it. You are in total control. there is quite a sense of accomplishment when you properly smooth damaged panels and you don’t have to get out the mud…. and make a lot of dust.
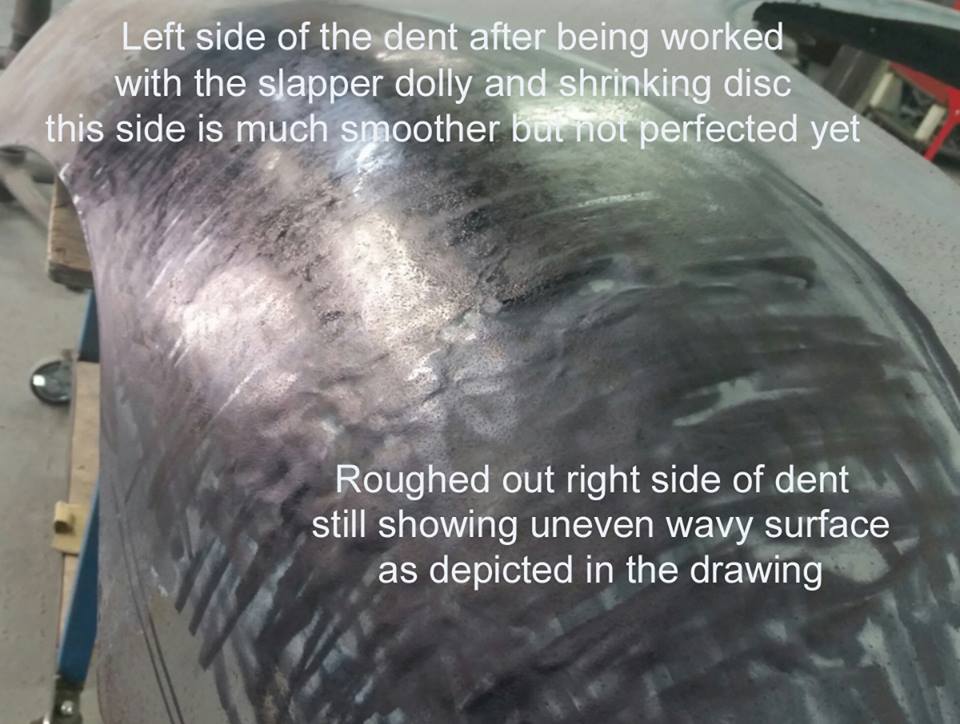
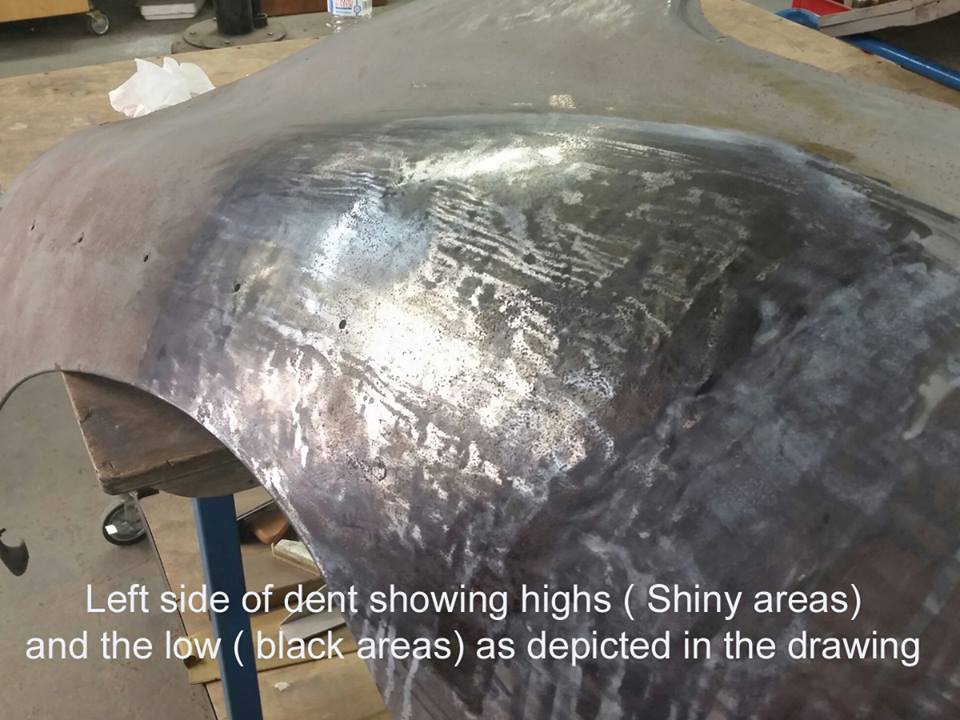
The third and fourth pictures show the actual dented area as it is now. On the left side it is about 95% there, most of the surface flow imperfections are less than a few thousands of an inch. On the right side waves are still there from the mallet operation when I took out the original dent. I’ll correct the left side first to show the contrast and the whole process. I’m teaching my sheet metal shaping class this weekend so it will be next week before I can follow up with part five. Lots more to tell about the process.