How to remove a dent (Part 3)
Taking out a massive 30 plus year old dent in a left rear quarter of a 1957 Porsche Speedster.
In this post I’ll highlight the tools required to inexpensively, professionally remove the massive dent that was in the left rear quarter. The results that you can expect using these tools is a surface finish as good or better than when the car left the factory. No fillers will be needed other than primer.
First off if there is stretching of the sheet metal that exceeds 1/8″ it is best to use a torch to quickly bring the spots down. In this case the metal was not stretched enough to use the torch. The torch is excellent at quickly bringing very stretched areas back to approximately where they need to be. If you have to use a torch it requires heating the stretched bulbous spot to a dull red and then whack it down with a body hammer. The red hot spot becomes plastic and allows the metal to flow into itself thickening and reducing the surface area. Several heatings and hitting with the body hammer might be required. After shrinking, the surface can be uneven. Lightly planish it out with a slapper and dolly. The shrinking disc will take it from there.
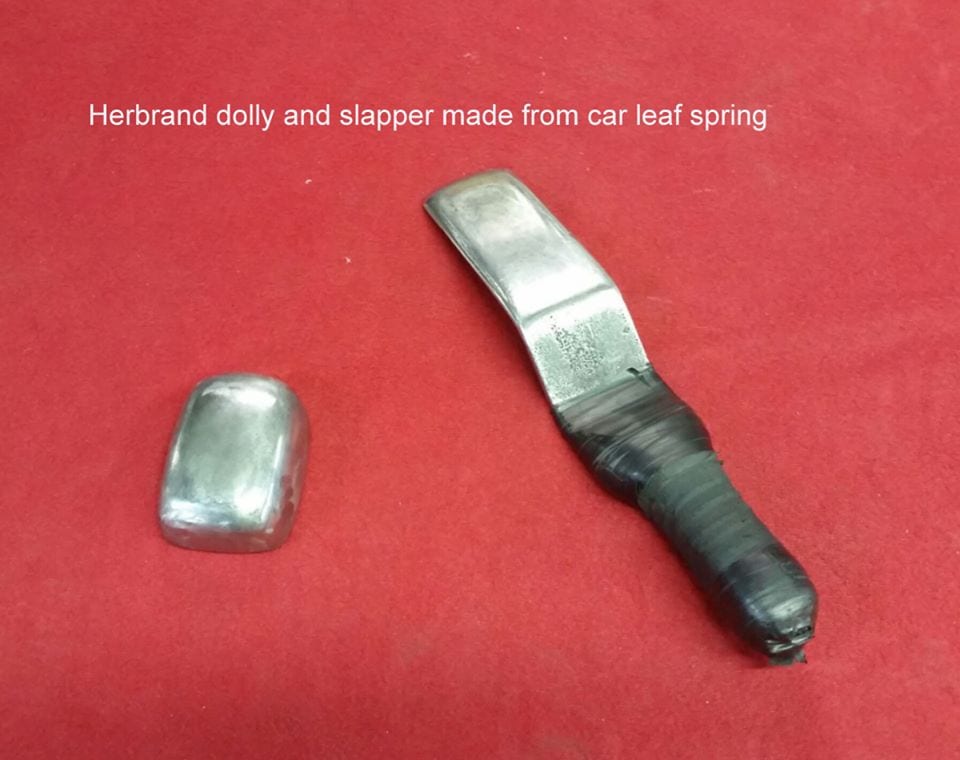
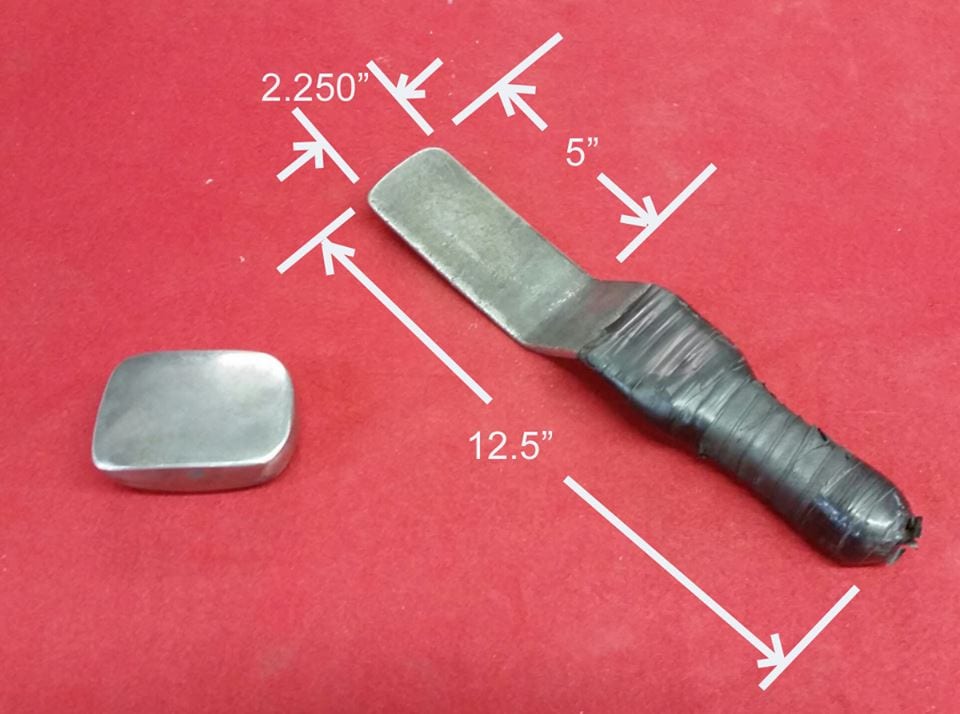
The first two pictures are of the slapper and dolly- front side and then the back side.
The dolly is a Herbrand Tools dolly. I think they have been out of business for years. I bought this dolly in 1967 off of the Herbrand tool guy who used to come to my grandfather’s restoration shop weekly. Little did I know that it would become my favorite body dolly. I use this dolly about 90% of the time. The shape is ideal. It has a low crown on one side and a medium crown on the other. The ends and sides have very useful shapes as well. The slapper I made from a Duesenberg rear spring that we had replaced. It is the perfect size. I use this slapper a lot more than body hammers. I have yet to see a commercially made slapper having all of the right features. I rounded all of working surface edges so that it won’t scar a panel if you mistakenly hit the panel at an angle .
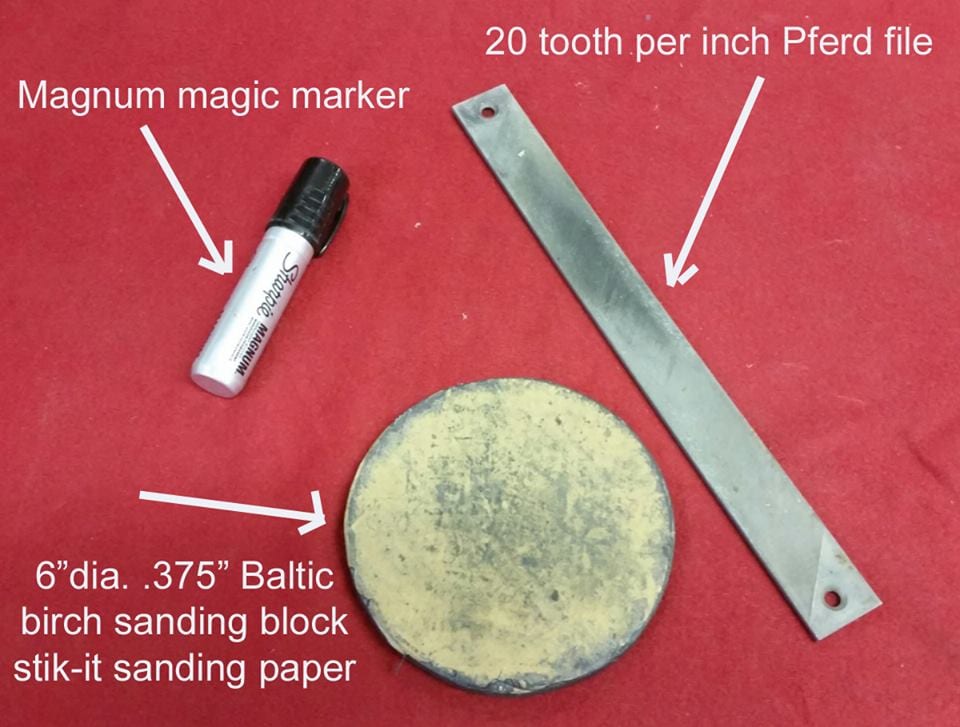
The third picture is of the preferred 5/8″ wide felt magic marker. I use markers instead of spray dies because I have found the markers work a lot better. I use the marker as a high and low indicator, and also as a lubricant for the shrinking disc. Without the marker the shrinking disc will scratch the surface leading to galling. With the marker you won’t get any galling. The disc will also build up a scum on it’s surface which will also keep the disc from galling. If you ever see sparks when using a shrinking disc you are galling the metal and you must stop and clean the build up on the disc by sanding it off. Use the marker and you will never have a problem. If you have heard from someone that shrinking discs don’t work good they don’t know how to use them. They are the best tool to super smooth a panel. They also work on aluminum but you will have to sand the panel after with 150 grit and a soft pad. Also in this picture is my Baltic birch plywood 6″ diameter sanding disc with 220 stik-it paper attached to both sides. The round 6″ shape works best on most shapes to sand the magic marker coated surface to find highs and lows. Little or no metal is removed. The other item in the picture is a German made Pferd brand – super fine 20 teeth per inch file. I also use this file to highlight the highs and lows. I rounded the edges so they don’t bite in. Little or no metal is removed when using the file. The file works slightly better than the sanding block to highlight the surface conditions.
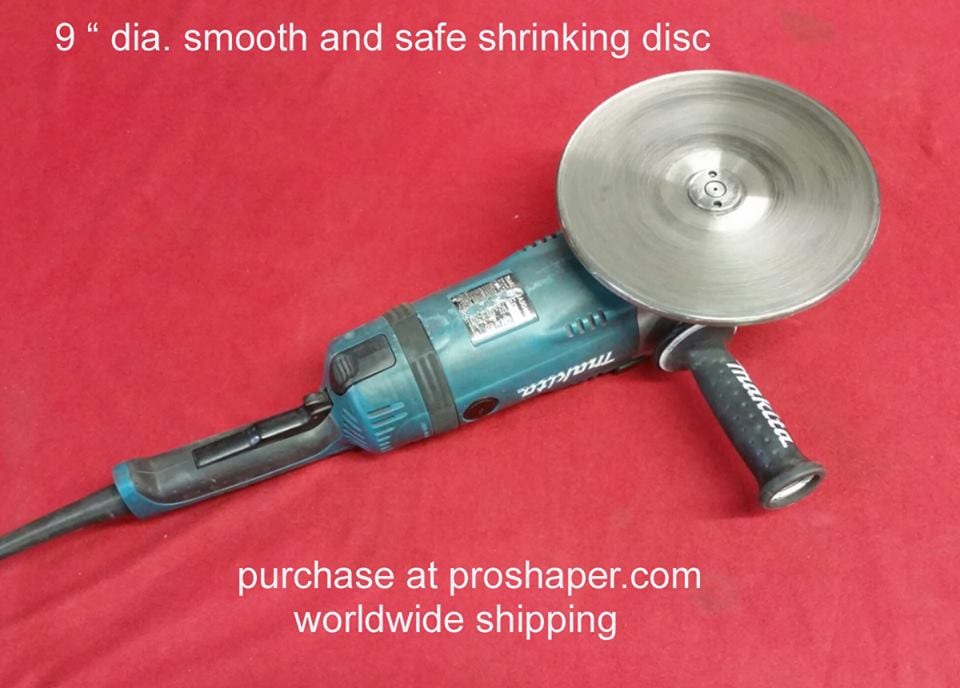
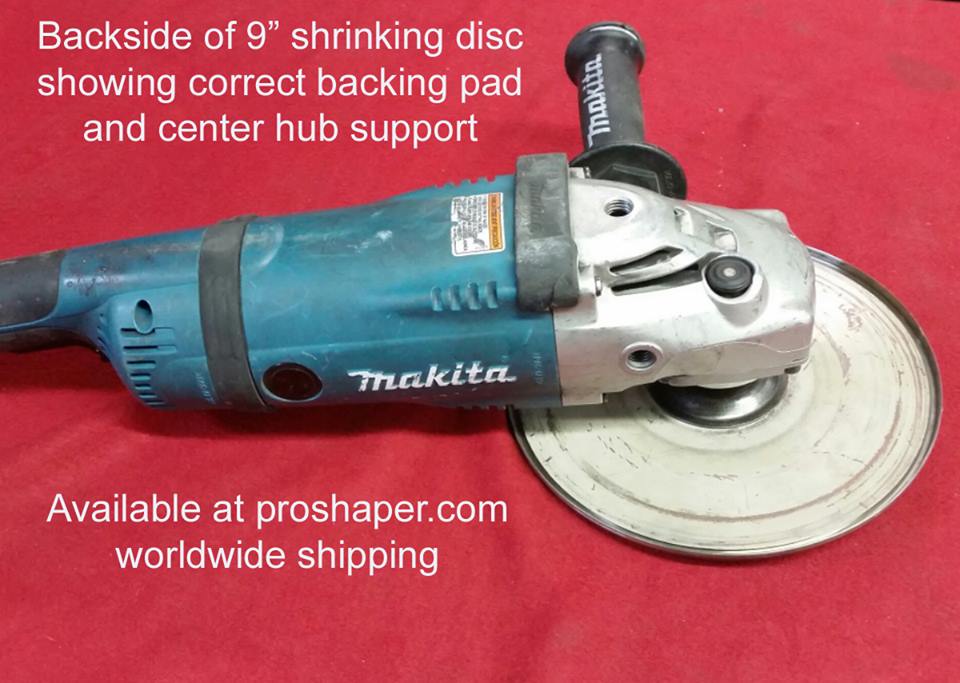
The fourth and fifth pictures are of my 9″ Makita grinder and my well used 9″ shrinking disc. The shrinking disc mounts on the grinder using first a central hub support ( usually supplied with the grinder when purchased) then a 9″ backing pad and then the shrinking disc. The nut used has a 7/8″ neck and a large flange. When mounted properly the nut is below the working surface of the disc. The disc is used running flat on the panel.
The concept of the shrinking disc goes back to at least the 1930s when bodymen would use dull flex back grinding discs as surface friction heaters. The heat causes the high metal to shrink ( more detail about this later in another post) Master metal shaper Scott Knight created the first stainless steel shrinking disc back in the early 80s. His design had a ruffled outer edge like a stove pipe. The ruffles were there to provide strength to the edge. They also marked the metal horribly and after using the disc for awhile the disc became a rotating razor. It was a great tool but not made right. Scott sold the ruffled style shrinking disc business to Ken Sakamoto
( Sunchaser Tools) who sold them for years.
I came up with the idea of the smooth and safe style shrinking disc first and have been selling them world wide for more than ten years. I also created the first smaller diameter shrinking disc for the small grinders. I have several copy cats out there selling my idea ( they will even claim they were the first to make them!!!) I sell my discs all over the world, They are available at my website.
HOW TO REMOVE A DENT (PART 4)
HOW TO REMOVE A DENT (PART 5)